The golf swing has so many moving parts that sometimes it seems impossible to get them all working together.
Takeaway. Hip turn. Staying in your posture to prevent early extension. Rotating correctly through impact. Forward shaft lean. They are all vital components to striking the ball well, yet all happen in less than a second.
It’s why golf is one of the hardest games in the world to play.
However, there’s another key element that is equally important to becoming a great golfer and should not be overlooked – it’s called wrist hinge.
Having the correct wrist hinge as you begin your takeaway, but more crucially when you arrive at the top of your backswing, can have a hugely positive chain reaction in your swing if done correctly – or set you on a path of destruction if done incorrectly.
But how much wrist hinge is enough? And is there an exact moment in your swing when you should begin to hinge your wrists?
Contrary to many beliefs, there is no ‘perfect’ wrist hinge in the golf swing. Some players will hinge their wrists early in the takeaway, while others won’t break their wrists until they reach the top of their backswing. There are even golfers who have almost no wrist hinge at all.
You only have to compare the swings of John Daly, Rory McIlroy and Bryson DeChambeau to realise that you can play Tour-level golf with very different degrees of wrist hinge.
Daly’s trademark long swing showcases unbelievable wrist flexibility that allows the clubhead to nearly touch his left knee at the top of the backswing; McIlroy has a beautiful one-piece takeaway that hinges only at the top; while DeChambeau has barely any wrist break at all and compensates with a huge shoulder turn.
They each have one thing in common though: they all comfortably hit the golf ball 300+ yards, demonstrating there is no one-size-fits-all when it comes to wrist hinge.
In this article, I’m going to bust some of the common misconceptions surrounding wrist hinge and wrist position in golf to help you understand your own swing better and, hopefully, improve.
Table of contents
What is the proper wrist hinge in golf?
There is no ‘proper’ wrist hinge in golf. Many coaches suggest to start breaking your wrists once you pass parallel in the takeaway, while others advocate a one-piece takeaway and only allowing your wrists to hinge at the top of the backswing. Both methods can produce repeatable, powerful golf swings.
Personally, I’ve always been part of the ‘one-piece takeaway’ school of golf ever since I watched a Greg Norman masterclass on YouTube.
The Great White Shark, as he’s affectionately known, was one of the longest, most accurate drivers on the PGA Tour for years and it was a big reason why he climbed all the way to the number one ranking in the world.
Norman advocates delaying wrist hinge in the takeaway and argues the club will naturally begin to fold the closer you come to the top of your backswing – this is something that Rory McIlroy also does in his swing.
He says you should focus on maintaining the triangle formed between your shoulders, arms and grip as you begin your swing, and that the movement of your body will deliver the club to the correct position at the top on its own.
Taking the club back in this manner – with a straight lead arm – increases the distance between your hands and the clubhead, and widens your arc in the backswing, which can translate to increased speed and, ultimately, distance.
On the other hand, there are plenty of golf instructors who prefer to see their players hinging their wrists earlier in the takeaway, in order to improve their turn and ensuring their wrists are in a decent position.
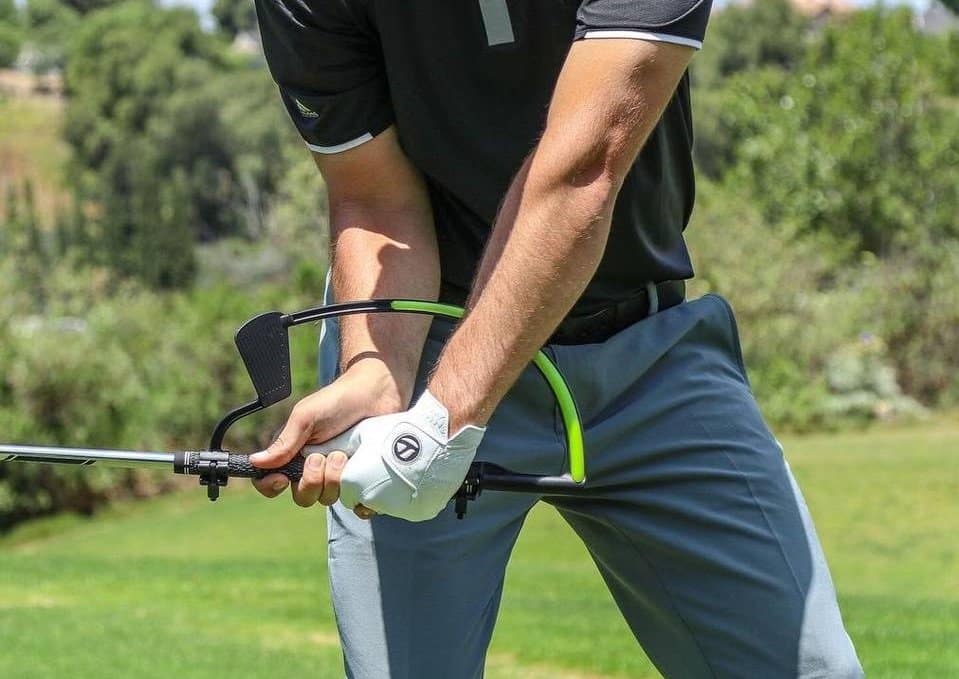
A great way to practice this technique is with the popular Golf Doctor Wrist Hinge Trainer, which is a simple, cheap aid you can attach to the shaft of your club and will give direct feedback on where your wrists should be during the swing. If you want even better feedback, The Hanger Wrist Training Aid (pictured above) is the perfect option.
While the one-piece takeaway and early hinge are the two most common methods when it comes to wrist break, there is no right or wrong technique.
Everyone has differing levels of flexibility – whether it be in your hip turn or shoulder turn – that will dictate just how much wrist hinge you can create at the top of the backswing, without losing your posture.
Players who have elbow issues and wear an elbow brace while they play, or who suffer knee pain, may be particularly restricted by what they can do and need to compensate.
The key is to try both techniques and see which is most comfortable: the easier it is to do, the easier it is to repeat, which is the key to a good golf swing.

Cupped, bowed or neutral wrist position: which is better?
While a neutral position at the top of the backswing is ideal, golfers can also play high-quality shots with a cupped or bowed wrist position as long as they sync-up their hip, chest and arm movements through impact.
How many times have you gone to a golf instructor and been told your wrists are either too open, or too shut at the top of your swing? I can count a few, at least.
The thing is, if your teaching pro is a bit lazy or wants to try and change your swing so that it looks more ‘classical’ (what I like to call the cookie-cutter method), they may improve your wrist position but could actually be making your swing worse if the new wrist action doesn’t match your natural body movement.
Take Dustin Johnson, Jon Rahm and Fred Couples, for instance.
Johnson and Rahm – two of the best golfers in the world – both have extremely bowed wrists at the top of their backswing, which creates an excessively closed clubface.
In order to deliver a square club to the ball at impact, both generate enormous rotation through their core and get their hips wide open by the time they strike the ball.
Couples, by comparison, has a slightly cupped wrist at the top of his swing and therefore doesn’t have to rotate as hard in order to deliver a square clubface.
What I’m trying to demonstrate is it’s largely irrelevant what position your wrist is in – while a neutral, flat wrist is a good place for amateurs to start, if you can consistently and repeatedly deliver a square club onto the ball, that’s all that really matters.
Should you hinge your wrists in the backswing?
Hinging too early in the backswing may improve consistency, but can cost you distance. Advocates of the one-piece takeaway argue your wrists will naturally hinge as you arrive at the top of your backswing, and that you shouldn’t force them to hinge prematurely.
As mentioned earlier in this article, there are two common trains of thought regarding wrist hinge in the backswing: the first being you should let your wrists break naturally following a wide, smooth takeaway, and the second being they should start hinging as soon as you reach parallel.
Those who recommend the latter say your straight lead arm and the club shaft should create a 90-degree angle when the arm is level with the ground.
This, in theory, means all you need to do to get the club into the correct backswing position at the top is to turn your chest and shoulders.
While I’ve tried this method, I still find the one-piece takeaway and delayed hinging of the wrists to be a far more natural, comfortable movement that allows me to generate the most consistency and distance.
Again, test out both techniques and see what works for you: there is no one-size-fits-all.
When should you set your wrists in the golf swing?
You can begin hinging your wrists at two moments in your takeaway: when your lead arm reaches parallel to the ground, or when the club nears the top of your backswing. If you prefer a one-piece takeaway, your wrists will naturally start hinging later in your swing.
Regardless of when your wrists should hinge, the consensus among almost all golf instructors is that they need to fold at some point in the swing.
If you take the club right up to the top of your backswing and prevent your wrists from hinging, you’ll limit your shoulder and hip turn and may begin to dip into your left side – otherwise known as a ‘reverse pivot’.
This move can be an absolute killer in your swing as it will prevent proper rotation in the downswing and often lead to stalling of the hips and early extending of the spine – these flaws can cause hooks, slices and inconsistent contact such as fats and thins.
I know this because it’s something I’ve battled in my own swing from time to time.
Allowing your wrists to break at the top of your backswing enables you to stay more centred over the ball, generate a bigger turn, and allow room for your hips to open through impact – all of which is key to solid ball-striking.
How do I get more wrist hinge in my golf swing?
The best way to get more wrist hinge in your golf swing is to use a training aid, or by practicing it with regular drills. A training aid is a great way to get direct feedback on where your wrist is positioned, while the drills can ingrain the positive changes you’ve made.
As I mentioned earlier, the Golf Doctor Wrist Hinge Trainer is an excellent, inexpensive device you can use to practice the correct wrist hinge in your swing, as is The Hanger Wrist Training Aid.
If you don’t fancy either of those, the Total Golf Wrist and Arm Trainer is another aid you can try.
But while these are all certainly effective tools when used on their own, you’ll see even better results when coupling them with some drills like the ones outlined below.
Drill #1: Upside down club hinge
If you want to get those wrists hinging early in the backswing, this drill from Me and My Golf is a beauty.
To perform the exercise, simply:
- Using a 7-iron, grab the club and turn it upside-down
- Grip it as you normally would, holding it just above the clubhead with the handle pointed at the ground
- Take your usual set-up and imagine there is a piece of mud stuck to the end of the handle
- Make some small swings as though you are trying to flick the piece of mud towards your target, without making an excessive backswing (the club shouldn’t go past parallel)
- Be sure to maintain a straight, lead arm and flick from your wrists
By limiting your body rotation, the only way to generate speed in the swing – and flick that imaginary mud towards your target – is to allow your wrists to hinge early.
You can practice this drill with or without the abovementioned training aids.
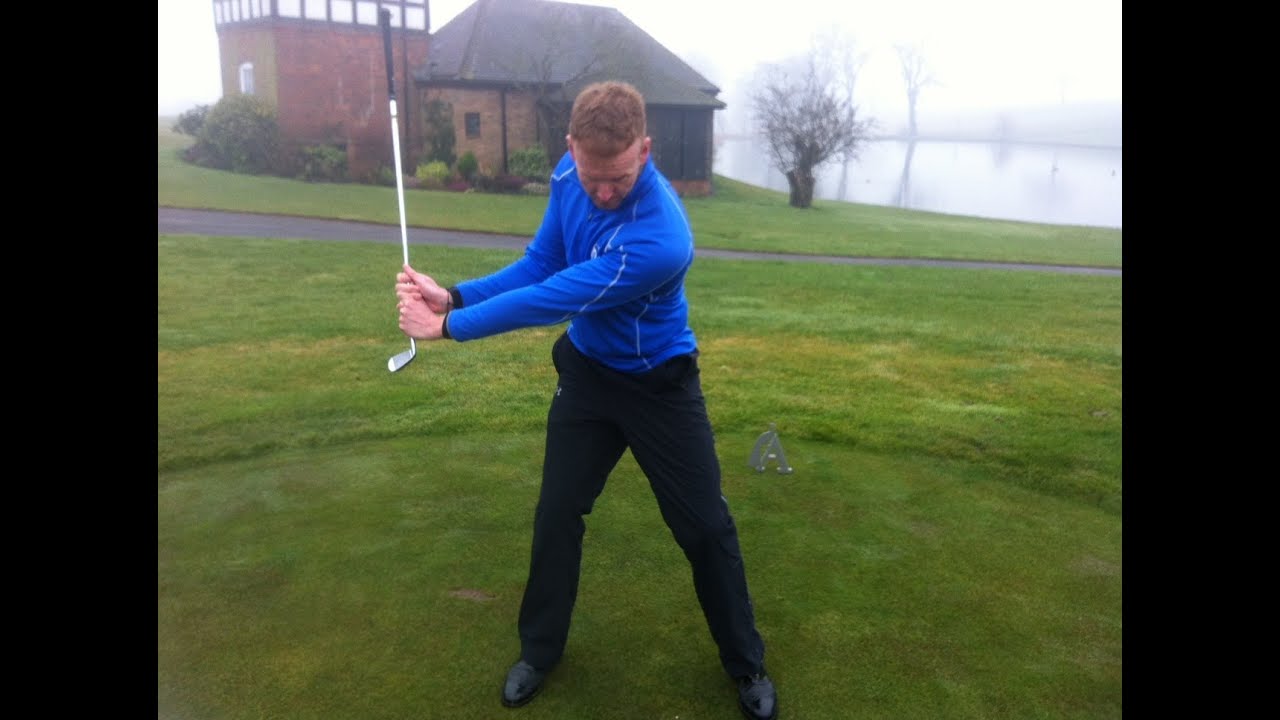
Drill #2: Pre-hinge and swing
This drill from Dan Whittaker is one of the classics when it comes to practicing wrist hinge.
While some golf instructors question its effectiveness, I’ve always found it to be helpful when trying to groove the feeling of my wrists breaking correctly in the takeaway.
To perform the exercise, simply:
- Place an alignment stick on the ground pointed at your target
- Address the golf ball in your normal set-up using a 7-iron
- Cock your wrists upward in front of you so that the club shaft and your forearms create a 90-degree angle
- Rotate your left arm (for a right-handed player) so that the clubhead reaches the parallel position in your takeaway (mimicking the direction of the alignment stick), while keeping your right elbow close to your body
- From here, simply turn to the top of your backswing while holding those wrist angles, and make a smooth downswing into the ball
Practice this over and over with a nice, fluent swing and you’ll soon notice an improvement in your ball-striking.
Remember, the key is not to try and smash the ball when doing this drill: it’s all about feeling your wrists hinging into the correct position in the takeaway, then backswing and, finally, into impact.
Final message
Whether you’re an early or late wrist hinger, what matters most is that your wrists break at the top of your backswing.
Doing this creates an extra lever in your swing that you can use to generate effortless power, and it helps deliver the club squarely onto the ball.
Practicing wrist hinge drills – either with or without a training aid – is the perfect way to hone the correct movements and you will see your ball-striking improve dramatically over time.

Drew lives in Tennessee and covers the American side of ProjectGolf Magazine.
- TaylorMade SIM2 Max Driver vs M4 Driver: Worth it in 2024? - April 15, 2024
- 3 Ways to Win the Mental Game with the Bridgestone Mindset Golf Ball - March 29, 2024
- TaylorMade SIM Max & SIM2 Max Drivers: Are they Still Relevant in 2024? - March 9, 2024