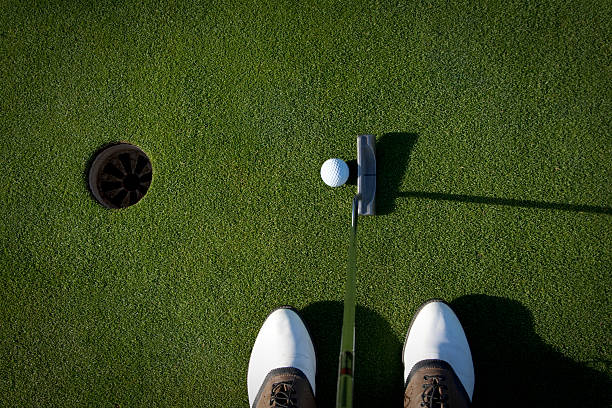
Starting the ball rolling on your intended line is arguably the most important technical element of putting.
Green reading is obviously crucial to picking the right target, and speed control also matters greatly.
Choosing the right grip – whether it’s a reverse overlap, claw, or even arm lock technique – is also imperative and comes down to personal preference, as does wearing a glove or not.
But all that aside, if your ball begins by rolling offline then you significantly reduce your chances of holing your putt – this is why alignment is so vital to your success with the putter.
So, what is the secret to lining up putts and starting the ball on-line?
Starting your putt on your intended line comes down to four key things: ball position, stance, picking a target, and delivering a square face at impact. If you can correctly complete these steps each time you stand over the ball on the greens, you’re going to hole more putts.
Generally, putting is one of the strengths of my own game, but there was a period where no matter what I did, I couldn’t seem to hole any putts out on the course.
I trawled the internet for days looking for answers, reading tonnes of articles and watching many YouTube videos to try and figure out how to line up my putts better.
In this article, I’ll share with you the best tips I learned to get your ball rolling on its intended target line, starting with the all-important, but often ignored, first step – ball position.
Table of contents
Where should the ball be in your putting stance?
Ball position when putting is determined by three things: your vision; your dominant eye; and how your eyes triangulate. To hole more putts, you must position the ball either forward or back in your stance depending on how it fits your eyes. Too far forward, you will hit putts left of target – too far back, you will hit putts right of target.
Above all else, ball position will have the greatest impact on the direction of your putt.
As world renowned putting coach Mike Shannon, of Odyssey Golf, explains:
If your ball is one inch out of place, either forward or backward, it will change your aim by three inches for every 10 feet (it travels). This is a critical part to being a good putter.
In order to be a really good aimer, find your front-to-back ball position (at address) and then maintain the width of your stance. If you do this, you’ll start to make some putts.
As Mike reiterates, once you’ve found the ‘sweet spot’ when it comes to ball position – which comes by simply moving the ball back and forward at address until you find a spot that is most comfortable – it’s important to keep your stance the same no matter the conditions.
For example, in windy conditions some players will widen their stance to try and create a more stable base – however, what they don’t realise is by doing this, their head naturally moves farther back behind the ball.
Similarly, if you narrow your stance, your head will automatically drift slightly in front of the ball.
Find your ideal ball position, maintain your stance, and you’ll have created the proper foundation to making a good putting stroke.
To practice this, next time you’re on the greens (or putting on your indoor mat at home), pick a target to putt at and keep adjusting your ball position in your stance until you are consistently hitting your target time after time.
You’ll soon find a position that works best and feels the most comfortable – this will be your optimal set-up position, based on how your eyes visualise your target.
So now that you know how to position your ball, let’s take a look at the alignment checklist you should follow before each putt.
How do you line up putts?
Once you’ve chosen your ball position, lining up putts comes down to four key things: reading the green; picking your target; lining up the putter face squarely; and correctly aligning your feet and shoulders. After completing these steps, the only thing left to do is focus on speed and making a smooth putting stroke.
Simple as that, right? Well, it can be – as long as you’re practicing the right things.
We’ve already discussed ball position, so now let’s break down each of these steps in more detail to explain exactly what you need to do.
Reading the green
It goes without saying that green reading an incredibly important skill to master and is an essential part of the process when it comes to lining up putts.
One of the best in the business when it comes to rolling the rock is PGA star Jordan Spieth, who golf legend Tiger Woods once described as “the greatest long putter ever”.
Spieth explained his green reading routine in a video a few years ago, with his key tips are as followed:
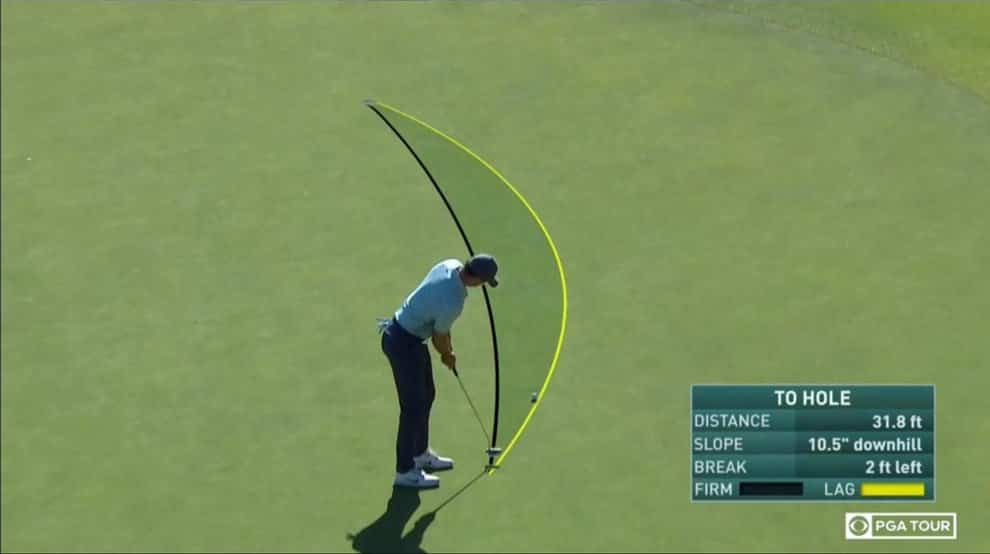
- First, read the putt from both directions to find the apex of the putt. The apex is the highest point of the break at which the ball will start turning towards the hole.
- Reading the putt from both directions will also help determine whether the putt is uphill or downhill, and whether it moves right or left.
- Once you’ve determined where the apex is, position yourself on the high side of the break and read the putt again from there. This will help determine where the fall line is, and where the putt turns straight towards the hole.
Following this process will set you up for success when it comes to making your putt. From here, the next step in the alignment sequence is picking your target.
Pick your target
Once you’ve determined the apex point of the putt, the next step is to choose your target.
Personally, I like to focus on the point on the green (the apex) where I think the ball will start breaking towards the hole as this helps me get the speed correct more often.
Other players will aim either below or above the apex, depending how hard they’re intending on hitting the putt (some players prefer to lag the putt into the hole, whereas others have more success hitting it firmer).
But, in summary, there are two different ways to pick your target:
Option 1: Focus on the apex point as your target
This is especially helpful for longer putts as the spot you’re aiming for is farther away from you.
Focusing on the apex point as your target can help you concentrate on speed – and also take in the whole green – rather than just alignment.
Option 2: Focus on a spot shortly in front of you
Rather than putting to the location near the apex point, some players may benefit from choosing a spot a few inches in front of their ball, along their target line, to aim at.
If you struggle visualising a point off in the distance, bringing that spot closer to you may help you start the ball on line more often.
But before we move to the next step, there’s one more question that divides opinion between golfers when it comes to lining up your putt that first needs answering…
Line vs no line: Which is better for lining up a putt?
An increasingly more common sight you’ll see on the PGA and European Tours these days are players marking their ball with a line to help them aim on the greens.
Other players, however, are quite happy putting without a line. So, which one is better? And what are the pros and cons for both? Let’s take a look.
Putting with a line
Pros
- Gives you visual feedback and can help align your putter face squarely to the line on the ball
- Great for players who find it hard visualising and hitting to a spot on the green
Cons
- Can cause players to focus too much on the line, which can affect their speed control
- Requires the line to be perfectly aimed at the intended target, leaving little margin for error (a few millimetres in the wrong direction can cause your putt to start offline)
Putting without a line
Pros
- Allows you to focus on a target point closer to the hole and take in the whole terrain of the green
- Allows you to putt with slightly more ‘feel’ rather than to a physical line on the ball
- Leaves more room for error in that you’re not lining up the ball to a spot on the green (more-so visualising it in your mind)
Cons
- Doesn’t give you any visual feedback about the direction of aim for your putt
- Players who find it hard to visualise a spot in front of them may struggle to start their putt on-line
When it boils down to it, each alignment technique has its advantages and disadvantages and it’s up to each individual to practice both methods on the greens and decide which they like best.
If you’re someone who likes using a line, you might be interested in the Golf EZ-Tri-line marking device which will produce a straight line on your ball every time.
Line up the putter face
Lining up your putter face to your target is super important because no matter how open or closed your stance is, how your putter strikes the ball will have a huge influence on the direction it travels.
A great way to practice a square putter face is by doing the following drill:
- Next time you’re on the green, put two tees in the ground a putter-head width apart (this will become your target)
- Stand six feet from the tees and try aligning your putter face at them as if you were about to make a putt
- Once you feel as though you’re lined up square, take another tee, bend down, and place it in the direction your putter face is pointing
- Take your putter away, stand behind the tee and see if it is pointing at your target
If the tee is pointing at your target, great! It means you lined your putter face up square. If the tee is pointing left or right of your target, it means the putter face wasn’t square.
Keep practicing this drill until you calibrate your body – especially your eyes and hands – to know what it feels like to have a square putter face pointed at your target.
Set your feet and align your shoulders
The general consensus I’ve found from golf instructors online is that feet and shoulder alignment should be either square, or slightly open, to your target line.
A great way to check your shoulder alignment is to line-up your putt and then place either your putter, or an alignment stick, across your shoulders.
This will give you visual feedback and a clear picture of where your shoulders are pointing.
You can do the same thing to check feet alignment by laying your putter, or an alignment stick, in front of your toes to determine which direction they are facing.
How can I improve my putting stroke alignment?
The best way to improve your putting stroke is by practicing (surprise, surprise).
Putt as much as you can in your spare time – whether it’s at your local course, or on your indoor putting mat at home (if you’re not sure which one to buy, check out our list of best value options).
But the only way I’ve seen my own putting truly improve is by getting visual feedback – and the best way to get it is by using some alignment training aids while putting.
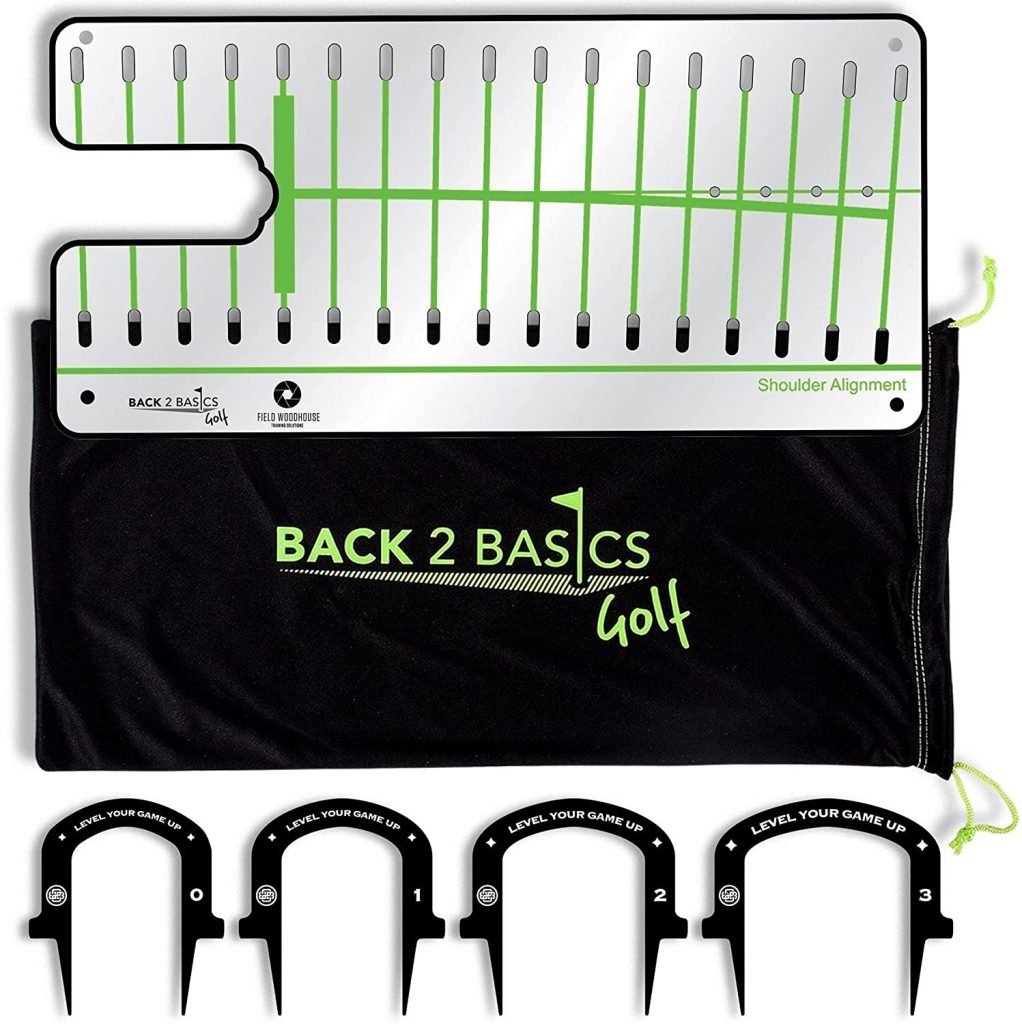
Best putting alignment aids
Here are some of the best, most affordable training aids you can buy online that will help you get the ball rolling on its intended line more often.
SharperGolf Putting Mat with Putting Mirror

In my opinion, this package has everything you need to improve your putting alignment and gives you the most bang for your buck in terms of what’s included.
The putting mat is 10 x 20 feet long and has three lines imprinted on it to tell you whether your putts are rolling straight or not.
Similarly, the putting mirror that comes with the package helps you determine where your eyes are relative to your ball and putter head, which will assist in getting ball position correct.
Lastly, there are two ball markers thrown in as well for players who like to draw a line on their ball to assist with their putting aim.
This is, in my opinion, the perfect package to start putting straighter.
PuttOut Golf Putting Plane
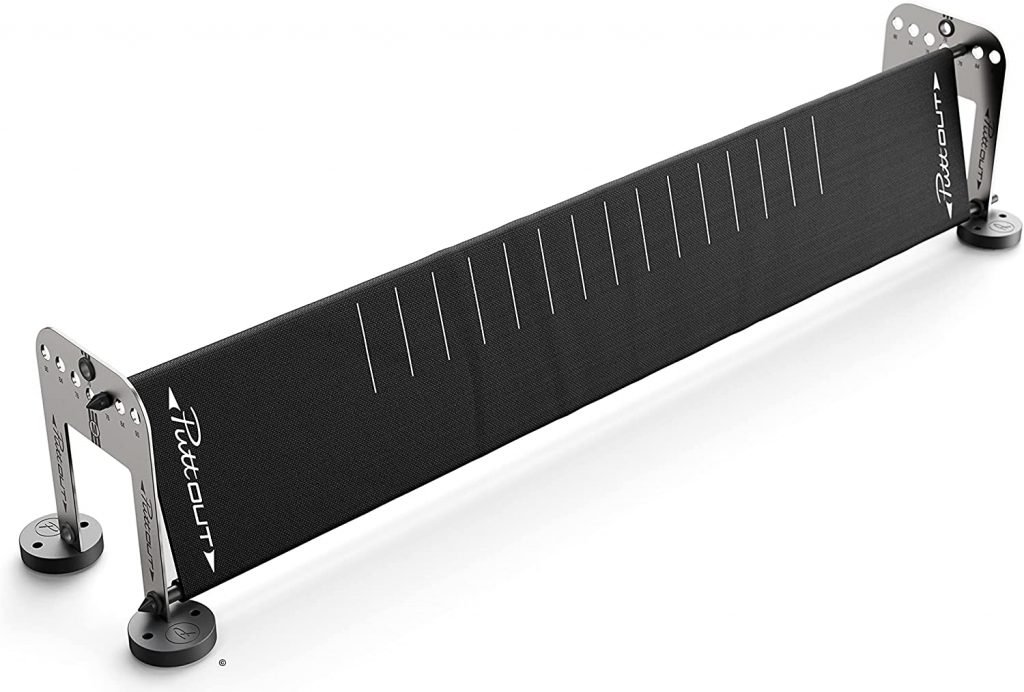
The PuttOut Golf Putting Plane is a great tool to hone your alignment.
Using the combination of two gates, alignment sticks (which come included) and the plane, you can measure your backswing and follow through while ensuring you are rolling the ball on your intended line.
This is a great tool you can use at the course or on your indoor putting green at home to improve your consistency.
Perfect Practice Putting Alignment Mirror
This is a pretty basic, cheap mirror that you can place on the ground and get immediate, visual feedback on whether your putts are starting online or not.
The reflective surface helps show where your eyes are relative to both your ball and putter face, which will definitely assist in finding that all-important ‘sweet spot’ for your ball position.
Pro Path Golf Putting Mirror
One of the most crucial factors to getting the ball started online is striking it with a square putter face, and this tool will help you do that.
The Pro Path Putting Mirror gives a clear outline of the arc your putter should travel on the backswing and follow through in order to deliver a neutral, square face at impact.
Practicing with this aid will get you grooving your perfect stroke in no time.
Final message
Getting the ball started on-line is so important to being exceptional with the putter.
But you will only improve if you put the effort in.
Practice regularly using the tips and training aids described above, and you’ll soon see more putts start to drop out on the course.

Drew lives in Tennessee and covers the American side of ProjectGolf Magazine.
- TaylorMade SIM2 Max Driver vs M4 Driver: Worth it in 2024? - April 15, 2024
- 3 Ways to Win the Mental Game with the Bridgestone Mindset Golf Ball - March 29, 2024
- TaylorMade SIM Max & SIM2 Max Drivers: Are they Still Relevant in 2024? - March 9, 2024